

How to Teach Kids to Tie Shoes 2026
 ·
April 1, 2026
·
April 1, 2026
Teaching your child to tie their shoes is a milestone that builds independence and confidence. While it might seem challenging at first, with the right techniques and patience, most children master shoe tying between ages 4 and 8.
This guide breaks down the best methods for teaching shoe tying, helps you determine if your child is ready, and provides practical tips to make the learning process stress-free and fun.
Fine motor skills develop at different rates. If your child struggles with shoe tying, it's likely a developmental matter, not a lack of effort. Focus on building confidence through celebration of small victories and regular, pressure-free practice.
Is Your Child Ready to Learn?
Before teaching shoe tying, your child should demonstrate certain skills. Most developmental experts suggest waiting until age 4-5, but readiness varies by child. Signs your child is ready include: ability to concentrate for 5-10 minutes, some independence in dressing themselves, ability to follow multi-step instructions, and decent hand coordination.
If your child is younger or shows less confidence, start with easier alternatives like Velcro shoes or slip-ons. These builds confidence and allow your child to practice self-dressing while developing fine motor skills for later lace-tying.
The Best Teaching Methods
There are several proven techniques for teaching shoe tying. Each method has strengths, and some children respond better to certain approaches than others. Try different methods to find what clicks with your child.
1. The Bunny Ears Method
This is the most popular method for young children. Start with a basic knot, then create two "bunny ears" (loops) and pull them tight. The advantage: it's easy to visualize and remember. The technique: tie a basic overhand knot first, then make two loops and pull them through the middle. Many children find this intuitive and fun, especially when you use the "bunny ears" language.
2. The Loop, Swoop, and Pull Method
This classic method involves making one loop (the "tree"), wrapping the other lace around it (the "squirrel"), and pulling it through the "hole." This method works well for sequential learners who benefit from a clear step-by-step process. It's also how many adults naturally tie shoes.
3. The Magic Fingers Method
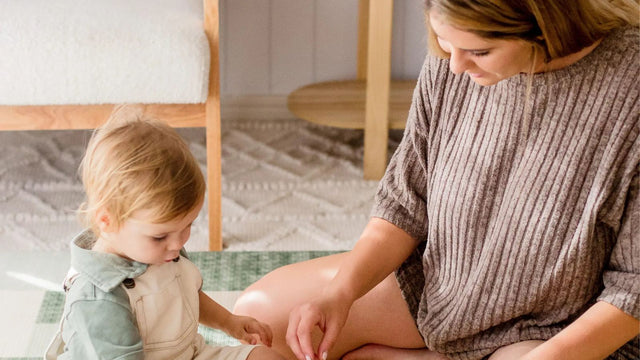
Use your child's own hands to demonstrate the technique with your hands guiding theirs. This kinesthetic approach works well for learners who benefit from physical guidance and muscle memory development. Hold their hands while going through the motions slowly, then gradually reduce your support as they gain confidence.
Practice Tips & Strategies for Success
Learning to tie shoes requires patience and consistency. Set yourself and your child up for success with these proven strategies.
Create the Right Environment
Practice when your child is rested and alert, not hungry or tired. Sit together at a table or on a low step where your child can see their shoes clearly. Good lighting is essential. Avoid practicing when rushing to school or appointments—this creates stress and frustration.
Use Practice Shoes or Boards
Many parents find it helpful to practice on a board with laces strung through holes, or with oversized practice shoes. This removes the pressure of tying actual shoes and allows focus on technique. Once the technique is solid, transition to real shoes.
Break It Into Small Steps
Don't try to teach the entire process in one lesson. Start with just making the first knot, then master that before moving to loops. Celebrate each small achievement. This incremental approach builds confidence and prevents overwhelm.
Make It Fun & Celebratory
Use celebratory language, sing songs, or use stories ("the bunny is hopping out of the hole!"). Make practice fun rather than a chore. Short, frequent practice sessions (10 minutes, several times a week) work better than long, intensive sessions.
Recommended Shoes for Practice
The right shoes make learning easier. Look for shoes with thick laces that are easy to grip, wider openings that don't require excessive dexterity, and laces that are firmly attached so they don't slip. Consider starting practice with training laces or thicker athletic laces before moving to standard dress shoes.
Many parents prefer starting with shoes that have Velcro or zip closures, then gradually introducing laced shoes as the child gains confidence. This allows your child to practice independence in dressing while building the skills needed for lace-tying.
Quick Verdict
Best Method for Most Kids: The Bunny Ears method is intuitive, fun, and works for the majority of children, especially ages 5-8.
Best Transitional Option: Start with Velcro or zip-closure shoes to build confidence in dressing independently, then transition to laced shoes.
Best Practice Approach: Use the kinesthetic "magic fingers" method combined with short, fun, frequent practice sessions for optimal results.
Frequently Asked Questions
At what age should I start teaching shoe tying?
Most children are developmentally ready between ages 4-8, with 5-6 being the typical window. However, readiness depends on individual fine motor development. If your child shows signs of readiness (concentration, hand coordination, following directions), you can start. If not, wait a few months and try again without pressure.
My child is older and still can't tie their shoes. Should I worry?
No. Some children's fine motor skills develop later, and this is completely normal. Continue to offer low-pressure opportunities to practice, consider consulting with their teacher or pediatrician if you have concerns, and remember that many schools have policies allowing slip-on shoes. At some point, most children master this skill with consistent practice.
How long does it usually take to learn?
This varies widely. Some children learn in a few weeks with regular practice, while others need several months. Most children benefit from 10-15 minutes of practice, several times a week. Consistency matters more than duration. Avoid comparing your child's progress to other children—everyone's timeline is different.
What if my child gets frustrated?
Frustration is normal and expected. If your child becomes upset, stop the lesson and take a break. Never force learning. Resume practice when both you and your child are calm and ready. Sometimes stepping back for a few weeks and then trying again makes all the difference.
Are there tricks to make loose knots stay tied?
Yes! Double-knotting (tying another knot on top of the first) helps secure shoes. Some parents also suggest using laces made from textured material (not slippery) and practicing on shoes with wider, more stable openings. Once your child masters the basic technique, these tricks will make ties last longer.
Should I push for laced shoes in school or allow slip-ons?
Every child and situation is different. If your child isn't ready, slip-ons or Velcro shoes are practical solutions that build independence in other ways. Many schools are flexible about this. Focus on your child's confidence and independence—shoes are a detail in the bigger picture of growing up.
What age should a child learn to tie shoes?
Most children develop the fine motor skills needed for shoe tying between ages 5-7. Some children are ready at 4, while others need until 7 or 8. Don't rush — every child develops at their own pace.
What is the easiest way to teach shoe tying?
The bunny ears method (making two loops and tying them together) is the easiest for young children. It's more intuitive than the standard method and builds confidence quickly.
How long does it take to learn to tie shoes?
With daily practice, most children learn basic shoe tying in 1-2 weeks. Mastering it to do quickly and independently may take several more weeks. Keep practice sessions short (5 minutes) and positive.
Keep reading
 MilestonesPotty Training Method Matcher: Which Approach Fits Your Family?
 MilestonesTraveling with a Toddler: The Complete Survival Guide (2026)
 MilestonesUnderstanding Toddler Tantrums: A Parent's Guide (2026)
 MilestonesThe Complete Potty Training Guide for Toddlers (2026)
 MilestonesYour 2-Year-Old Toddler: Milestones & Development (2026)
 MilestonesYour 18-Month-Old Toddler: Milestones & Development (2026)
 MilestonesYour 12-Month-Old Baby: Milestones & Development (2026)
 MilestonesYour 11-Month-Old Baby: Milestones & Development (2026)
 MilestonesYour 10-Month-Old Baby: Milestones & Development (2026)
 MilestonesYour 9-Month-Old Baby: Milestones & Development (2026)
 MilestonesYour 8-Month-Old Baby: Milestones & Development (2026)
 MilestonesYour 7-Month-Old Baby: Milestones & Development (2026)